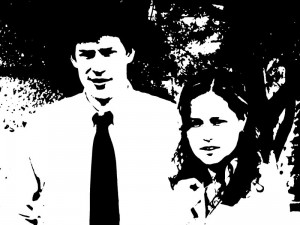
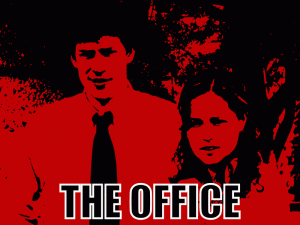
Someone at worked asked for my help in creating a 2-color Stella logo effect like seen in the head shots here:
There is a quick and easy method that gets pretty close. This works best on images with lighter backgrounds so the subjects do not get colored into the background.
1. Adjust Brightness (so subjects are not washed out, or not too dark).
2. Blur (so there is not as much detail)
3. Reduce to 2 colors
In a little more detail, using this image at an example:
1. Adjust Brightness
Adjusting the brightness changes the amount of black (shaded) or white (unshaded) in the final picture. I also like to turn the contrast way up, because it gives me a good idea about which areas will be shaded, and which areas will not.
This is the step you have to play around with to get the right look — and it depends a lot on the lighting of the original picture.
In Paint Shop Pro, I set Brightness = 28, Contrast = 100.
2. Blur
The more you blur, the fewer details you will end up with. So if you are getting too many specks on the the face, you could try blurring more.
In Paint Shop Pro, I used a Gaussian Blur with radius = 2.00.
3. Reduce to 2 colors
The easiest way to do this is just make the image black and white. Afterwards you may want to soften the edges.
In Paint Shop Pro, use “Decreased color depth – 2 Colors” using the Nearest color reduction method. You will want to avoid using dithering or error diffusion in this step.
Then you can add color back in if you want to.
By the way, this effect is a great way to redeem some blurry camera shots (you can just skip step 2).


One response
Do you want to comment?
Comments RSS and TrackBack Identifier URI ?
Trackbacks